
Last spring we had our metal porch roof replaced. The roof is now much sturdier and doesn’t leak. However, the old roof had the benefit of having vintage metal scrollwork porch supports, which I had painted periwinkle blue, instead of their original black. They made perfect trellises for annual vines to grow on. Now, we have much stronger looking square steel posts that are very functional for their intended purpose, but not so much as trellises. I didn’t want to give up growing vines around my porch, so I had to look for other solutions.
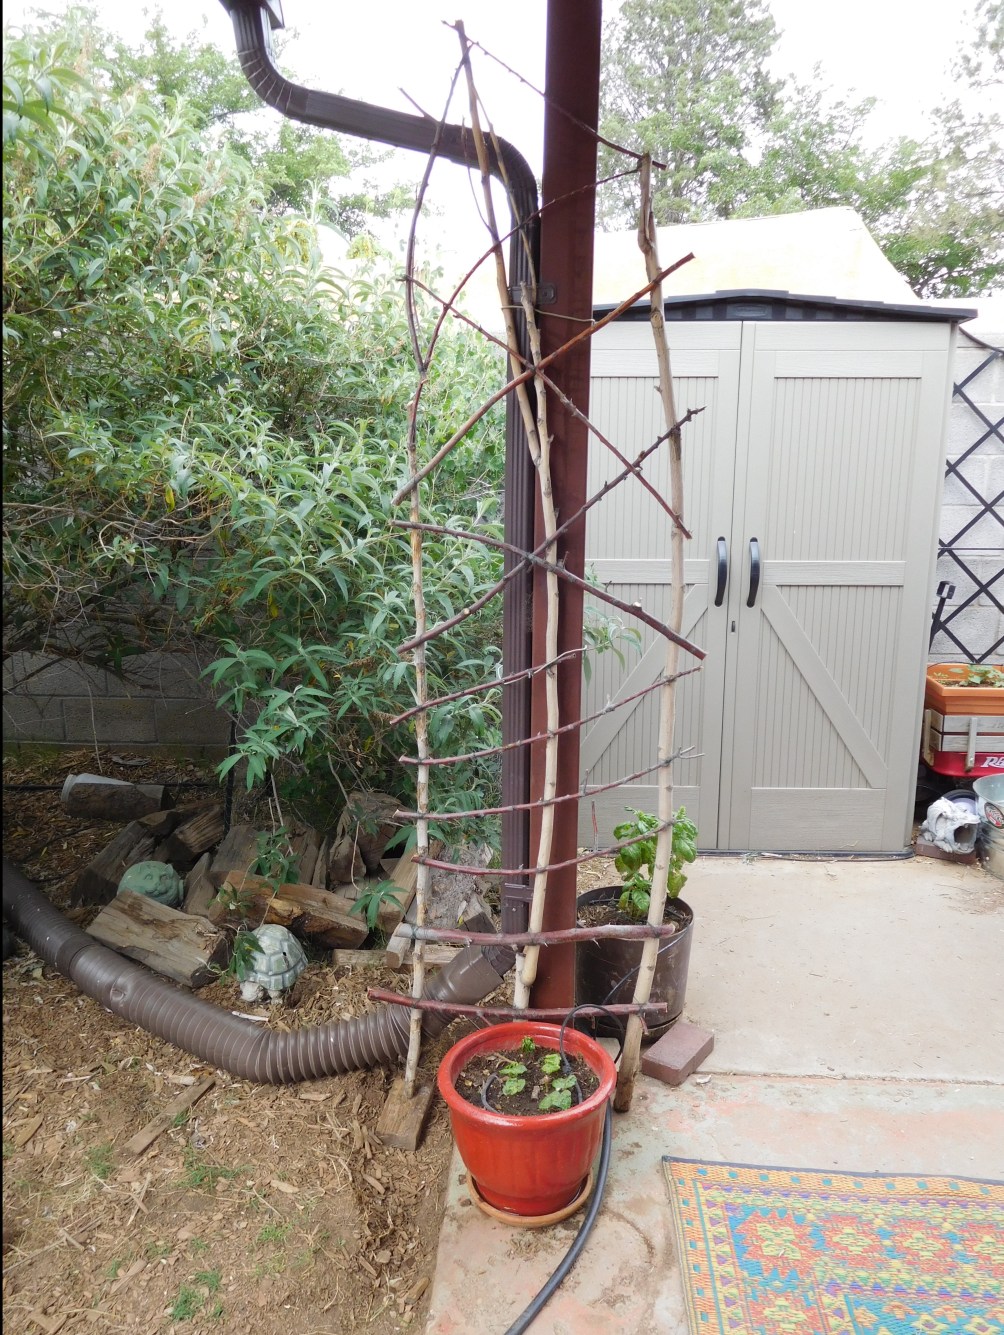
A couple of years ago we had to take down a dead Russian olive tree in the yard. Olive wood is gorgeous, hard wood with attractive bark, especially on smaller branches, so I saved as much of the wood as I could to use for future projects. I decided that the small branches that were still lying around in the pile would be perfect for a trellis that would hide one of the posts.
I used olive branches for the crosspieces, but didn’t have any that were the right size and straight enough to be the vertical supports on the trellis. Instead, I used 3 sapling trunks that I had saved from the Chinese Pistache trees that sprout like weeds in Albuquerque. It’s softer wood than the olive, but the trellis is in an out of the way spot, so it should be okay.
My goal was to make a lightweight trellis, by myself, out of materials that I already had around the house. To attach the pieces of the trellis together, I used a large reel of florists wire that I had from previous projects, and only used tools that I already owned. That accomplished the goal of using only materials that I already had.
I used thin sticks and kept the trellis narrow. The porch roof is only 7 feet high at the point where I wanted the trellis, so the height was already limited. That kept the trellis lightweight and easy to maneuver, since I have various physical challenges to work around.
I had thought that I’d be able to use clippers to trim the olive wood sticks to the lengths I wanted, but they really are hard wood, even at 1/4″ thick! I ended up having my husband trim the lengths using the tools in the photo below, and a saw for 1 or 2. Since many of the sticks didn’t need to be trimmed, and I did everything else, from gathering materials to attaching it to the post, I’m still counting it as a win! 😘

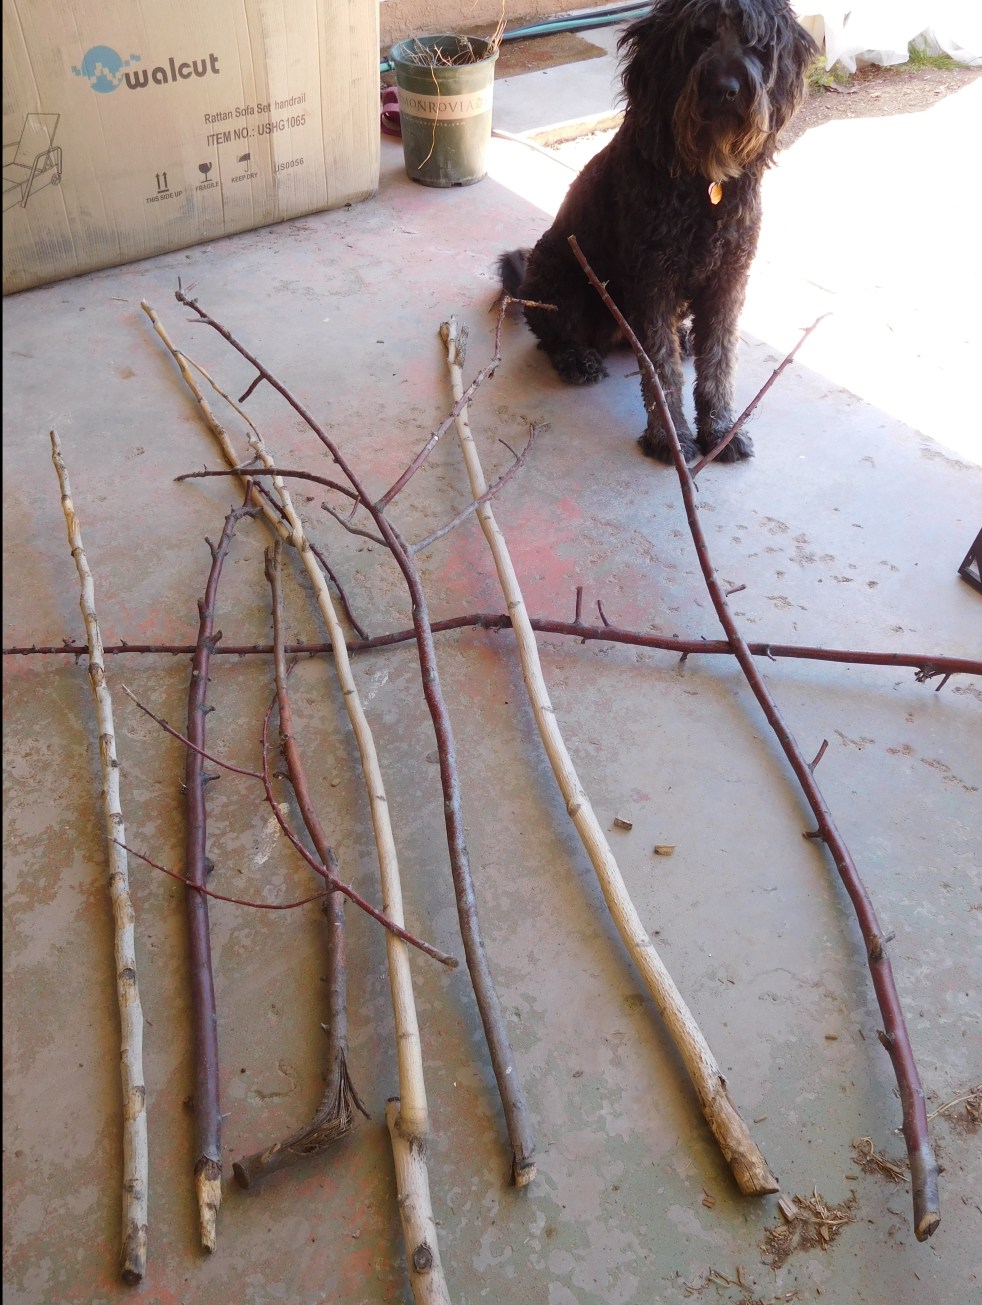
The first order of business, as with every project, was to clear my work space and gather materials. Both canine assistants and all 9 chickens eagerly helped with the decisions as to which were the best sticks for the job.
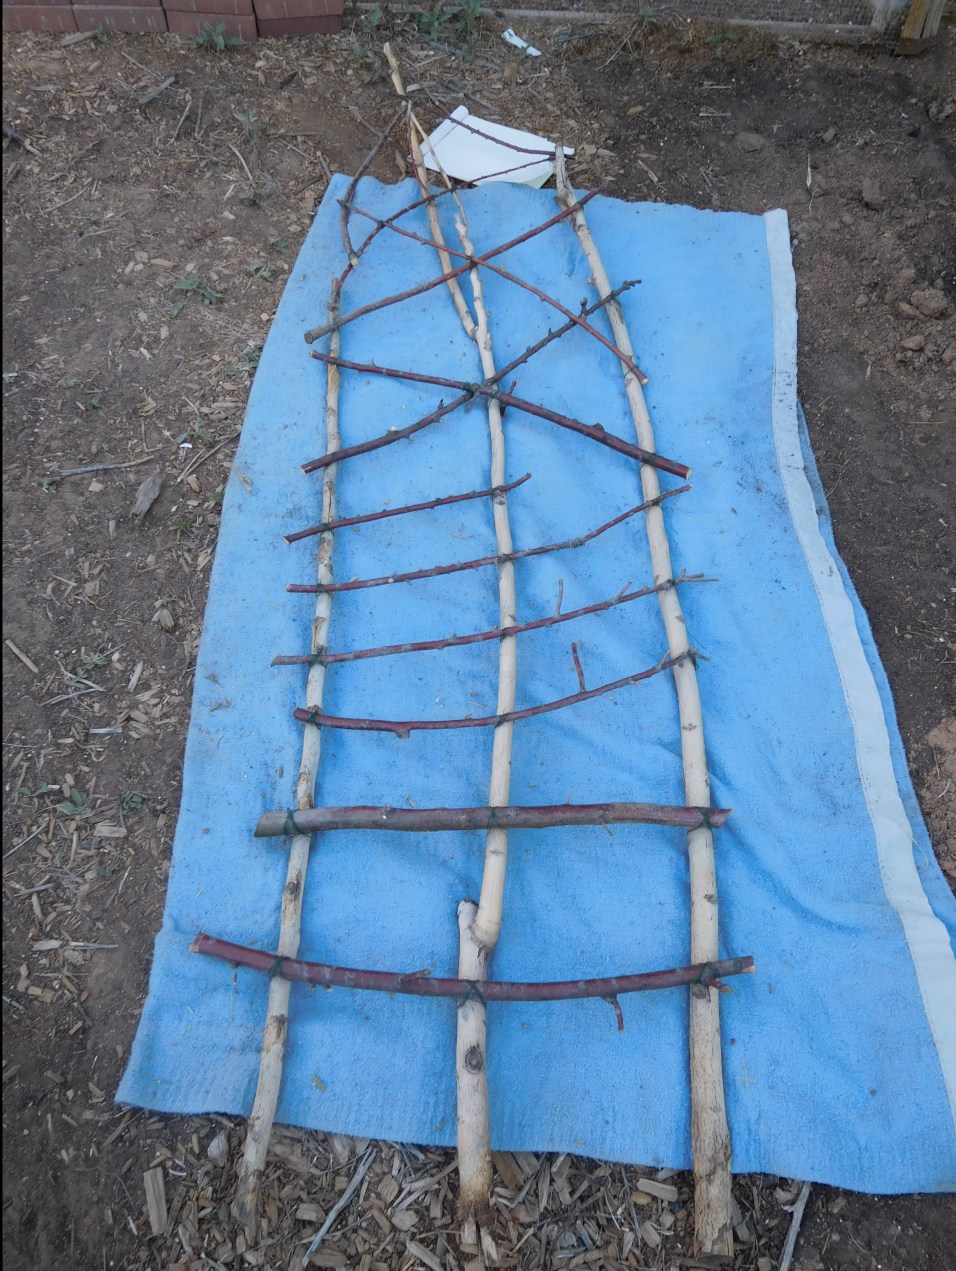
Once that was decided, I laid the sticks out on the porch floor and started deciding what would go where. It became obvious that the pistache saplings should be the vertical supports, so I laid those out side by side to measure the correct distance between them and make sure the ends were flat and even, so that the trellis would stand straight.

Next, it was time to measure out the crosspieces and clip them to size. I ended up needing to go forage for another couple of sticks from the yard, and get a little help from my husband.

Then I laid out all of the crosspieces in their permanent spots. I went through with the florists wire and tied each crosspiece securely to the vertical pieces at every point where they touched. Securely= wrapping the wire several to many times in each direction, and changing direction frequently. This was the longest part of the process.
The only difficult part was making sure that the sticks didn’t shift as I was working with them, so there was a lot of stopping to remeasure and make sure that everything was still where it was meant to be. Working with round, crooked sticks meant a lot of uneven edges to bounce around as I shifted the wire or the canine assistants wandered through to check my progress.


Here it is. The saplings all had a bit of a sway to the left, so the trellis does, too. Have I mentioned that it gets windy here in ABQ?
It’s ready to be tied to the post in its new home. I used a combination of soft foam coated twisty wire and more florists wire, depending on how much space I had to work with. You can also get a closer look at the way I wrapped the trellis joints in wire in these photos. I won’t be winning any awards for knot tying with my substandard small motor skills, but it’s working out okay.


The wood had all been cut for at least 2 years, and was very dry, so having the wood swell and shrink shouldn’t be much of a problem. The trellis is under the edge of the porch roof, so the wire should hold for a long time. If it starts to get loose, I’ll tack it together with small screws or nails. I’ve had to do that with wooden trellises and other items that moved with me from the Northeast, since this environment is so much drier and the wood shrank without its normal northeastern humidity.

It’s not perfect, but I like the rustic look of it. It reminds me of something we might have found in the Adirondacks Back East. The florist wire is thin enough so as not to be noticed from a distance. All of my annual vines have grown slowly and bloomed late this year because of a long, extra-hot heat wave in June. The moonflowers bloom at night, but if I can eventually get a photo of them blooming, I’ll post it.
